Setting up Active Directory and DNS for RHEV Manager
Active Directory acts as the domain controller for the Windows Server 2003 installation. Therefore, Active Directory must be installed and configured before joining RHEV Manager to the domain .
We need to Create one Active Directory user to use during the installation of RHEV Manager for administration purpose of RHEV .
The RHEV Manager server must be configured with a fully qualified name that is resolvable throughout the system by the host and clients. So you need a proper working DNS in you set up .
In our set up we are going to configure AD/DNS on the same box where we are going to install RHEVM . We also see how to join RHEVM to the existing domain server later in the section and the AD user creation for the RHEV Administration .
AD/DNS Set Up on the same RHEVM System
Computer Name : rhevm
Domain Name : test.example.internal
Full Computer Name: rhevm.test.example.internal
DNS Domain Name: test.example.internal
Reverse Look up Zone Network : 10.10.1.0
DNS Host 1 : rhevh1.test.example.internal(10.10.1.11)
DNS Host 2 : rhevh2.test.example.internal(10.10.1.12)
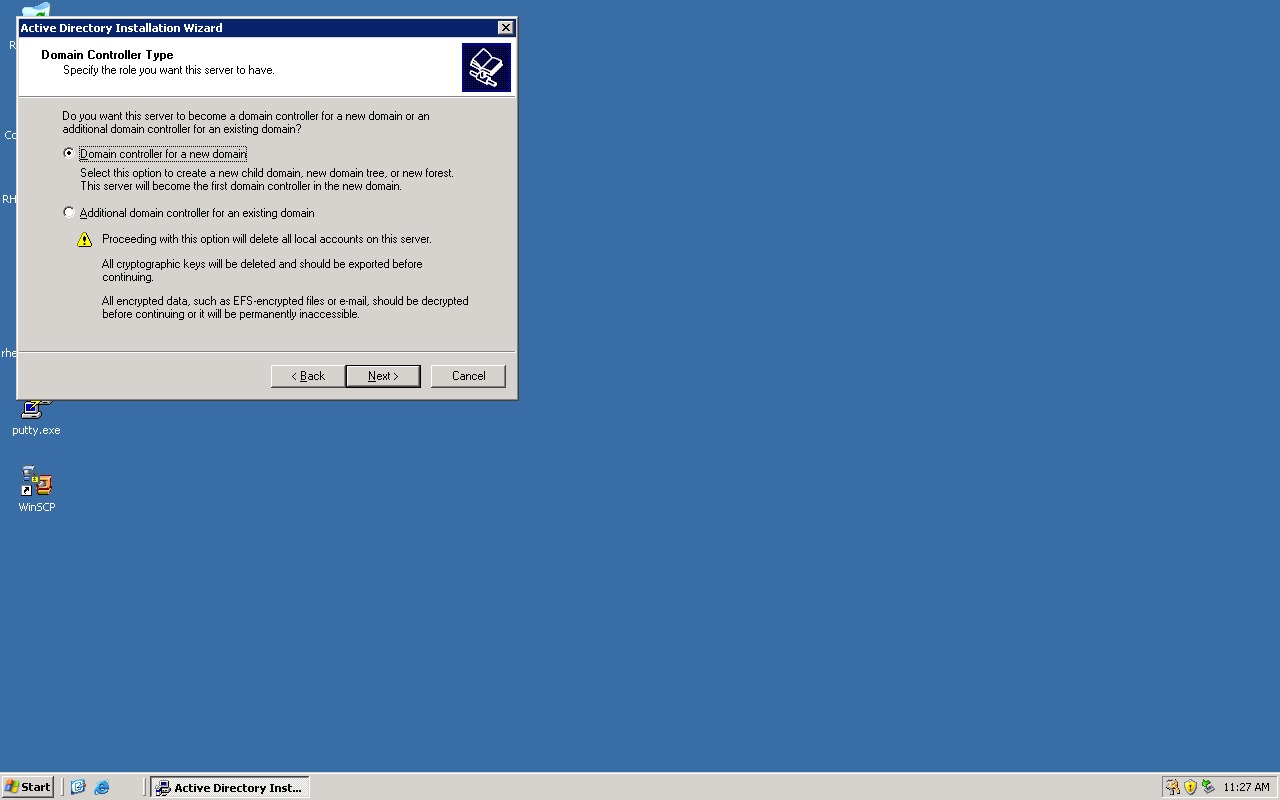
Go to Start--> Run -->> dcpromo

Click Next -->> Next


Select Domain Controller for a New Domain and Click Next
Select Domain in a New Forest and Click Next

Add the Domain DNS Name example test.example.internal

Leave the Default NetBios Name as it is and Click Next

Leave the below valuse Default and Click Next --> Next


Select Install and configure DNS on this Computer and Click Next

Select Permission Compatible only with windows 2000 or 2003

Feed the AD Restore Password and Click Next --> Next --> Next


Once the Active DIrectory and DNS Service installed , Reboot the server to take effect.
DNS Forward and Reverse Lookup Zone Configuration
After the server reboot , you should configure the DNS , To do that Go To start -- >> Administrative tools -->> DNS . You will see the forward zone created for the domain test.example.internal with the rhevm pointer to the the rhevm ip .

Now its the time to create a Reverse Lookup zone. Select Reverse Lookup Zone -- >> Right Click -->> New Zone --> Next


Select Primary Zone and To all Domain Controller on domain test.example.internal on the next screen and Click Next


Select Allow only secure Dynamic Updates -->> Next --> Finish


Now we will add new host named rhevh1 to the forward and reverse Look up Zone Select test.example.internal from the forward lookup zone and Right Click and Select New Host (A)

Enter the host name example rhevh1 and give the appropriate ip to bind with the name we used 10.65.70.231 in our case and Select Create Associate PTR Record for Revrese Lookup for the host

Similarly we added one more host name rhevh2 blinded to the 10.65.70.232 and rhevm own DNS Entry in the forward and Reverse Lookup Zone of the DNS Server as below .


Finally Refresh the new entry you made by Right Click on Corresponding Forward and Reverse Zone and Refresh . Now you are having the working DNS and AD running on you server and you can verify the DNS you configured using the nslookup command line from the linux host or from your windows command prompt .
[paps@paps-standby jpg]$ nslookup
> server 10.65.70.234
Default server: 10.65.70.234
Address: 10.65.70.234#53
> rhevh1.test.example.internal
Server: 10.65.70.234
Address: 10.65.70.234#53
Name: rhevh1.test.example.internal
Address: 10.65.70.231
> rhevh2.test.example.internal
Server: 10.65.70.234
Address: 10.65.70.234#53
Name: rhevh2.test.example.internal
Address: 10.65.70.232
> rhevm.test.example.internal
Server: 10.65.70.234
Address: 10.65.70.234#53
Name: rhevm.test.example.internal
Address: 10.65.70.234
> 10.65.70.234
Server: 10.65.70.234
Address: 10.65.70.234#53
** server can't find 234.70.65.10.in-addr.arpa.: NXDOMAIN
> 10.65.70.231
Server: 10.65.70.234
Address: 10.65.70.234#53
231.70.65.10.in-addr.arpa name = rhevh1.test.example.internal.
> 10.65.70.232
Server: 10.65.70.234
Address: 10.65.70.234#53
232.70.65.10.in-addr.arpa name = rhevh2.test.example.internal.
AD User Creation for RHEV Manager Administration
The RHEV admin user credentials are provided during the RHEV Manager installation. This account is used when logging into the RHEV admin portal to manage the system.
The RHEV admin user must have permission to:
- Add an unlimited number of virtual machines to the domain.
- Query Active Directory.Start -->> Administrative Tools -->> Active Directory Users and Computers -->> Right Click On Users -->>New User -->> Feed the Login Credentials and Finish .In our example we used a user called rhevadmin to manage our rhevm infrastructure .
 In order to be able to add more than ten virtual machines to the domain, the user must be a member of either the Account Operators, Domain Admins, or Enterprise Admins group within Active directory. For further information, refer to http://technet.microsoft.com/en-us/library/cc781364(WS.10).aspxNow we will give a domain admin rights to that user by selecting the User Properties -->> Member of -->> Add -->> Domain AdmiN Groups --> Select OK.
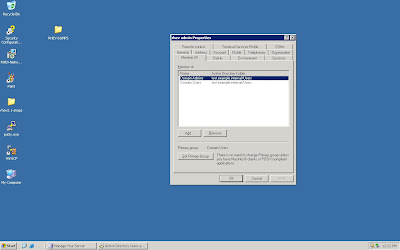
Joining RHEVM to the exisitng Domain ControllerTo join an Active Directory domain from Windows Server 2003:- Go to Start, right-click My Computer and select Properties.
- Select the Computer Name tab.
- Ensure that the Computer description field contains the fully qualified computer name. If not, enter it now.
- Click Change....
- Enter the domain information and click Ok.
- When prompted for the credentials of a user that can join machines to the domain, enter the RHEV administrator user credentials created as per the above AD User Creation for RHEV Steps Then click Ok.
- If successful, a message will be displayed confirming that the computer has been joined to the domain. Click Ok to continue.If a confirmation message was not received, this is likely to be due to one of the following:
- Domain specified is incorrect.
- User credentials specified are incorrect.
- User credentials provided do not have the necessary permissions to join a machine to the domain.
Check your Active Directory configuration and credentials and try again. - Reboot the machine to complete the process.
Once it is done you are Ready to Install other RHEVM Components by following this below URL


No comments:
Post a Comment