Installing Red Hat Enterprise Virtualization Manager
Installing the Operating System
Install Windows Server 2003 32-bit (or R2) with Service Pack 2 by booting from the installation media and following the on-screen instructions.
Note: Only the English locale is supported when installing the RHEV Manager on Windows Server 2003.
Once the installation of Windows Server 2003 (or R2) 32-bit edition is complete, confirm that Service Pack 2 was included in the initial installation of Windows Server 2003 before proceeding.
Right-click on My Computer and choose Properties
Confirm that Service Pack 2 is listed under the System information.

RHEVM Active Directory and DNS
Active Directory acts as the domain controller for the Windows Server 2003 installation. Therefore, Active Directory must be installed and configured before joining RHEV Manager to the domain .
We need to Create one Active Directory user to use during the installation of RHEV Manager for administration purpose of RHEV .
The RHEV Manager server must be configured with a fully qualified name that is resolvable throughout the system by the host and clients. So you need a proper working DNS in you set up . Please refer the following URL for Active Directory and DNS Configuration .
http://rcritical.blogspot.com/2010/11/rhevm-addns-setup.html
Add components
It is necessary to install additional Windows components and perform updates before installing Red Hat Enterprise Virtualization Manager Manager application.
Install .NET Framework 3.5 Service Pack 1


Verify that .NET Framework 3.5 Service Pack 1 was installed by going to Start > Control Panel > Add or Remove Programs and checking that it is listed,


Install Microsoft .NET Framework 3.5 Family Update for Windows Server 2003.
Filename:


From Add/Remove Programs, click on Add/Remove Windows Components. Then From the Windows Components Wizard, select the Application Server check box and click Details.

Filename:
NDP35SP1-KB958484-x86.exeAvailable from: http://www.microsoft.com/downloads/details.aspx?familyid=6c095bba-6100-4ec9-9c54-6450b0212565&displaylang=en&displaylang=en


From Add/Remove Programs, click on Add/Remove Windows Components. Then From the Windows Components Wizard, select the Application Server check box and click Details.

From the Application Server window, check the following options:


Set the password for the database


Application Server Console
ASP.NET
Enable network COM+ access
Enable network DTC access
Internet Information Services (IIS)


Install Windows PowerShell 1.0
Filename:
WindowsServer2003-KB926139-v2-x86-ENU.exe Available from: http://www.microsoft.com/downloads/details.aspx?FamilyId=10EE29AF-7C3A-4057-8367-C9C1DAB6E2BF&displaylang=en
Verify PowerShell installed successfully by going to Start > All Programs > Windows PowerShell 1.0.


Use Microsoft Windows Update to install all available updates.
Installing RHEV Manager
This section describes the installation of the RHEV Manager application.
It is expected that the installation wizard will minimize at times throughout the installation process. The wizard will reappear when ready to proceed with the next step
Double-click the RHEV Manager installation file to execute the installation wizard. You may need to wait while the wizard prepares for installation.
When presented with the welcome screen, click Next.


To continue with the installation you must accept the terms of the License Agreement by clicking Yes. The wizard will proceed to the next step.

Select Features A typical installation includes the following features:

RHEVM Admin Portal: used to manage the RHEV system and perform associated tasks.
RHEVM Database: holds RHEV system information regarding created objects, configuration and logging history.
RHEVM Service: the core RHEV Manager application.
RHEVM Scripting Library: PowerShell scripting library and documentation.
RHEVM Net Console: remote console service used for logging purposes.
RHEVM Web Admin: web-based administrator portal.
Select the features to be installed. If a checkbox is gray, this indicates that the feature is required for installation.
Note: It is recommended that all features are installed by default.
Although installation of a local RHEV Manager database is recommended, the Database checkbox can be unmarked to use an existing database. We will see how to use the external Database on a different document .
Select the Install a SQL Server 2005 Express Locally option.

Set the password for the database sa user.

Select the location for the RHEV Manager installation.

Either select the desired website from the drop-down menu or create a new site.

To set a custom name:
Click Create a new site.
Enter the desired site name in the New site name field.
Enter the site port in the Port field.
Leave the Force SSL checkbox selected.
Provide the Active Directory domain and user details to be used by RHEV Manager.

These credentials will be used on the first run of template-created servers to associate users and groups with specific virtual servers within the system. Therefore, this user requires permissions to create computer objects within Active Directory.
At the Certification details screen:
Enter the name of your organization in the Organization name field.
Enter the fully qualified name for the RHEV Manager server in the Fully qualified computer name field.

Confirm that the information entered is correct and click Next to proceed.
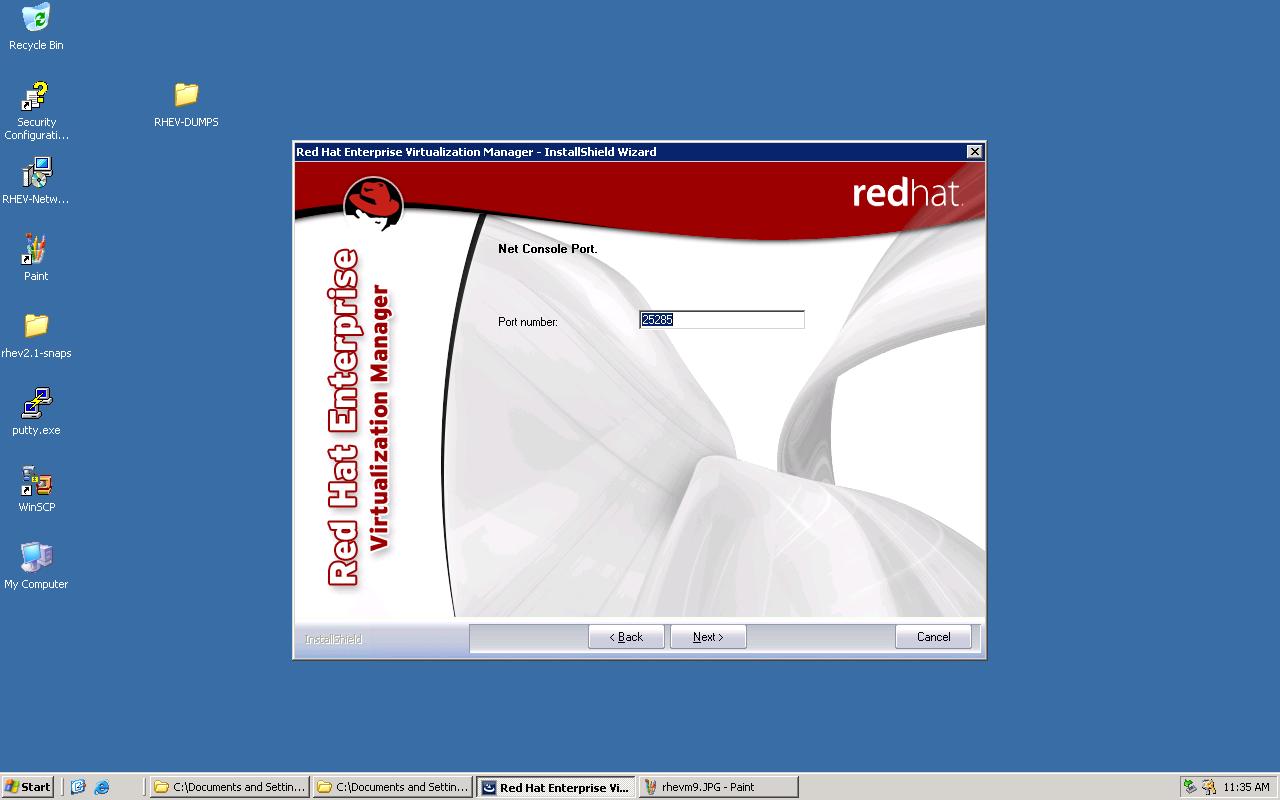
A default net console port will be supplied by the installation wizard. Accept the default value and click Next .
The installation wizard will present a summary of the installation information entered.
Once all details are correct, click Next to continue.


Note: If there are any running applications using files that require updating, you are notified to close these before proceeding. Once this is done, click Retry to continue.
Python Extensions for Microsoft Windows
At the Setup screen, click Next to proceed.

It is recommended that the installation uses the default settings provided, including the python and installation directories. Click Next to continue.

The Python installation process begins. Once complete, click Finish to exit the setup wizard.

The RHEV Manager installation will continue and may take some time to complete. When finished, the installation wizard will confirm that that it has completed the installation. Click Finish to exit.

Login to the administrator portal
Accessing the administrator portal requires a client with Windows XP and .NET Framework 3.5 Service Pack 1 installed.
Open the administrator portal login screen by clicking on Start > All Programs > Red Hat > RHEV Manager > RHEVManager.


No comments:
Post a Comment